A Copper Country Homestead
This blog has been created to share our experiences homesteading in the Copper Country. We are located in Houghton County of Michigan's Upper Peninsula. This land has given us the opportunity to grow a 9,000 sq. ft. fruit and vegetable garden, plant a small orchard, keep chickens and bees and make maple syrup. When we are not busy here on the property, we are out and about camping, kayaking, fishing and foraging this beautiful area.
Sunday, March 17, 2013
Aurora fall of 2012
Monday, January 21, 2013
How to build a Track Setter for Cross Country Skiing.
With the arrival of winter, finally, I
think it is time to have a posting about what goes on here when there
is snow on the ground.
In the fall of 2010, we constructed a
couple miles of trails on the property. Our intentions of the trail
system are to have the ability to walking and trail run in the
spring, summer and fall and to snowshoe and cross country ski in
the winter. We originally skied the trails after packing them with
my 1972 Ski-Doo Olympique 340 snowmobile. Sarah had mentioned that
it would be really nice to have tracks to follow. This got me
thinking about how to build a track setter to be towed behind the
snowmobile. I researched a few sites with a general search of how to
build a track setter and this link was the most helpful.
http://www.marcusnyberg.com/wp-content/uploads/2010/02/Tracksetter.pdf
Making the Track
Setter
This was constructed in a couple hours
using scrap lumber and the odd hardware I had laying around. I found
the dimensions for spacing the molds by searching online. I merely
substituted lumber for the metal. The molds for the tracks are waxed
with old scraped off ski wax that was on our ski waxing bench. This
seems to work well. Originally, it was designed for old weights from
a weight bench set to be affixed, but I soon realized I needed more
weight than I had. The weight also needed to be placed further back
on the track setter. A cement block was then added. I ended up
adding a 2x6 piece of lumber to either side after first building it.
It is pictured how it currently used.
If I were to do things differently, I
would have put a piece of flashing under the body of the track setter
to reduce the icing. I am thinking of adding some “wings” to to
front to pull in snow for track setting in low snow conditions. The
biggest problem I have been facing are the skegs. I made these out
of some scrap plywood and the front edges keep shattering when
hitting buried obstacles. I am trying to find some scrap metal plate
to remake them.
I eventually will build the goose neck
hitch pictured in the plans, I am still thinking of how to do this
without a welder. I have also seen plans on how to hook this to the
snowmobile by mounting it to a pivot point attached to the tunnel.
My goal is to build the hitch so it can be easily switched between
the track setter and the leveler I built (next blog).
Building a trail leveler.
Making the Leveler
Last season, I discovered I needed a
way to pack the trails before setting tracks. This could be
accomplished by running the snowmobile around the loops many times,
but I wanted a way to do it more quickly.
I built a simple “V” drag to pull
behind the snowmobile last season. This worked fairly well but I am
always looking to build new things. During the fall I started
researching how to build a trail leveler. This proved to be much
more difficult than the track setter. I have yet to find any plans
for a DIY leveler. I found a few pictures on webpages of people who
have built their own using metal and welding pieces together, but
none were made out of lumber. There are a couple of companies who
sell them, but are really expensive. I do not yet have a welder and
find it unlikely my snowmobile could pull a heavy metal drag. Here
are some photos of what I have created.
I started by building a frame from
2x4's. This is 33” wide, I came to this width based on how wide my
snowmobile is and how narrow our trails are. The length is 4'. I
put a couple cross members in to affix the cutters to. These are
made out of metal bought from the hardware store. The first two
sets of cutters have teeth ground into them. This was done on a
bench grinder (very time consuming) and the last set of cutters are
smooth edged.
The first couple times using the
leveler I discovered it worked too well, cutting deep into the trail
bed. This was remedied by adding skegs to the sides that are on an
angle. This is so the front cutters are below the leading edge of
the skegs and at the rear the skegs extend about an inch below the
cutters. The tow ropes are attached to the frame with eye bolts. I
had some old dry rotted rope laying around that I made loops out of
then tie the good (tow) rope to. This way the old dry rotted rope
breaks away when you catch a stump or tree with the drag when taking
corners too tight. This design works well for me.
Always trying to one up things, I
figured it would be cool to have a combed look to the grooming when
done. This is done with a piece of plastic that I cut 1”x1”
teeth into. I built a couple risers on the back of the leveler and
attached springs to these. The springs are then attached to the
plate of teeth, in order to apply down pressure. The plate is
attached to the frame of the leveler with two hinges. So far this is
working well. I do want to reinforce the plastic by laminating it
with a piece of plywood. However the combed look is pretty well lost
by the time I run around the trails and set the tracks so it is an
addition that most likely could be skipped. I do use this on several
of the trails that we do not ski on though, and it is easy to become
spoiled snowshoeing on a nice, flat combed trail. This only works on
certain snowshoeing trails we have, some are too rugged to get the
snowmobile down. And, it is still fun to have to really snowshoe!
Sunday, August 26, 2012
Putting Up Food
I am pretty new to this 'putting up your food' concept and have relied heavily on websites and books to guide me along in this process. My sister gave me a book titled "The Complete Book of Small-Batch Preserving: Over 300 Recipes to Use Year-Round" by Ellie Topp and Margaret Howard. This book has been extremely helpful in finding excellent recipes for pickles, chutneys, salsas and jams. The batches I preserve are by no means "small", so I do have to double and sometimes triple the recipes. The website www.pickyourown.org has be tremendously helpful when learning about blanching and freezing produce and canning beans and tomatoes. I've used several recipes from this site and highly recommend it for anyone looking to preserve food.
Once August rolls around, everyone is sick of zucchini! They are prolific and can get away from you if you are not out there picking daily. The ones that are as large as baseball bats are not really good for grilling or sauteing, but are perfect for shredding for zucchini bread (see recipe in a previous post) or for a delicious zucchini relish. This relish is great on brats or hot dogs. A friend told me she made a pasta and chicken salad out of the relish and it turned out great. So, here is the recipe! Enjoy!
7 cups shredded zucchini
3 cups shredded yellow squash
2 cups chopped onions
5 Tbsp. canning salt
6 bell peppers, chopped (red, yellow, orange or green)
1 small hot pepper, chopped
2 1/2 cups apple cider vinegar
2 1/2 cups white sugar
2 1/2 cups brown sugar
2 Tbsp. celery seed
1 Tbsp. nutmeg
1 Tbsp. tumeric
1/2 tsp. black pepper
2 Tbsp. cornstarch
Place squash, onions and salt in a pan overnight. Rinse well and strain the excess water. Add remaining ingredients to the pan and cook for 30 minutes. Place in hot sterilized canning jars and process in a hot water bath for 15 minutes after the water boils. If the jars did not seal, store the relish in the refrigerator.
Welcome to Our Garden
Welcome to our garden |
The garden in June |
The garden in August |
We grow over 60 different vegetables and fruits, with multiple varieties of some items. Last year we harvested around 700 pounds of tomatoes! This year we are anticipating over 1200 pounds of tomatoes! We will be able to provide our CSA customers with canning tomatoes and hope to find others that are interested in purchasing tomatoes by the bushel.
I see sauerkraut in my future |
September is a busy month for putting up our food for the winter. We have already made several kinds of pickles, zucchini relish and have canned corn that was given to us by a neighbor. We were given a large crock to use in our attempt to make sauerkraut. It looks pretty easy from my research. The most important variable seems to be keeping the temperature consistent during the fermenting process.
Freezing is our other way of putting up our food. Freezer space is running low though, so I'll have to get creative. I just purchased a large food dehydrator so I'll have to delve into a new way of processing our food. I've read that dehydrating actually retains more nutrients that freezing or canning. I'm sure I'll be posting something about dehydrating once I figure out how to use it!
August Harvest |
Goddess Cantaloupe and Moon & Stars watermelon |
Thursday, August 23, 2012
Meet Cheeky!
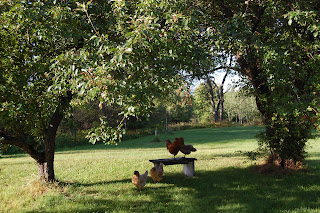
We finally got our laying hens and a rooster named Cheeky (he came with
that name, in case you are wondering). Cheeky is
quite handsome and is adored by his ladies. They follow him around and
he in turn keeps a vigilant eye on them. Having a rooster around has
been very enjoyable, even if he crows at 4:30 in the morning. We are
very fortunate to have these chickens given to us. They are an
Ameraucana breed that lay a bluish colored egg. We usually will find 1 or 2 eggs per
day from the 3 hens. We let them free range when we are home, but need to
keep them in a large fenced in pen to protect them from the various
predators we have out here. We feed them an organic feed, which they
barely eat due to their constant search for bugs, grass, seeds and our
vegetable scraps. They currently are cooped up in the coop that was used
to raise our meat chickens. We are in the process of building a larger
coop that will be attached to a garden shed.
Subscribe to:
Posts (Atom)